How to Do Concrete Coating | Guide for Long-Lasting Results
Concrete coating is one of the most effective ways to protect and enhance concrete surfaces. Whether you want to improve a garage floor, driveway, patio, basement, or commercial floor, a high-quality coating increases durability, resists stains, and creates a professional appearance. Moreover, concrete coatings help prevent moisture damage, chemical exposure, and surface wear.
This guide explains how to do concrete coating correctly, from preparation to final curing, ensuring long-lasting results.
What Is Concrete Coating?
Concrete coating & treatment involves applying a protective layer over a concrete surface. This layer shields the concrete from damage while improving its appearance.
Common concrete coating options include:
- Epoxy coatings
- Polyurethane coatings
- Polyaspartic coatings
- Acrylic sealers
- Decorative concrete overlays
Additionally, each coating type offers different levels of durability, chemical resistance, and aesthetic appeal.
Benefits of Concrete Coating
Before starting the project, it is important to understand the advantages of concrete coating.
Enhanced Durability
A quality coating protects concrete from abrasion, impact, and daily wear.
Moisture Protection
Coatings create a barrier that prevents water penetration and reduces cracking.
Improved Appearance
Furthermore, coatings provide a clean, polished, and modern finish.
Chemical Resistance
Many coatings resist oil, grease, salt, and household chemicals.
Easier Maintenance
As a result, coated surfaces require less cleaning and maintenance.
Tools and Materials Needed
Gather all necessary supplies before beginning the project.
Tools
- Pressure washer
- Concrete grinder or floor buffer
- Paint roller
- Paint brushes
- Mixing bucket
- Squeegee
- Safety goggles
- Protective gloves
Materials
- Concrete cleaner
- Crack filler
- Concrete etching solution
- Concrete coating product
- Primer (if required)
- Decorative flakes (optional)
- Topcoat sealer
Having everything ready will streamline the installation process.
Step 1: Inspect the Concrete Surface
First, inspect the concrete thoroughly.
Look for:
- Cracks
- Holes
- Oil stains
- Moisture issues
- Surface deterioration
Additionally, determine whether the concrete has previous coatings that require removal.
Proper evaluation helps prevent future coating failures.
Step 2: Clean the Surface Thoroughly
Surface preparation plays the most important role in coating success.
Start by removing:
- Dirt
- Dust
- Grease
- Oil
- Paint residue
Use a pressure washer or concrete cleaner for deep cleaning. Afterward, allow the surface to dry completely.
Without proper cleaning, the coating may fail to bond effectively.
Step 3: Repair Cracks and Damage
Next, repair all visible defects.
Fill cracks, chips, and holes using a concrete repair compound. Then smooth the repaired areas to create an even surface.
Consequently, the coating will adhere uniformly and produce a professional finish.
Step 4: Etch or Grind the Concrete
Concrete coatings require a textured surface for maximum adhesion.
You can achieve this through:
Acid Etching
Apply a concrete etching solution according to the manufacturer’s instructions. Then rinse thoroughly and allow the surface to dry.
Mechanical Grinding
Alternatively, use a concrete grinder to open the pores of the concrete.
Many professionals prefer grinding because it creates consistent surface preparation.
Step 5: Test for Moisture
Before applying any coating, perform a moisture test.
Tape a plastic sheet to the floor and leave it for 24 hours. If condensation forms underneath, excessive moisture exists.
Therefore, resolve moisture issues before proceeding.
Ignoring moisture problems often causes peeling and bubbling.
Step 6: Apply Primer
Some coating systems require a primer.
The primer:
- Improves adhesion
- Reduces air bubbles
- Creates a stronger bond
Apply the primer evenly using a roller. Then allow it to dry according to product guidelines.
Furthermore, avoid rushing this stage because proper curing affects the final result.
Step 7: Mix the Concrete Coating
Follow the manufacturer’s instructions carefully.
For epoxy coatings, mix the resin and hardener thoroughly. However, only prepare the amount you can apply within the specified working time.
Accurate mixing ensures proper curing and maximum durability.
Step 8: Apply the First Coat
Now begin the coating application.
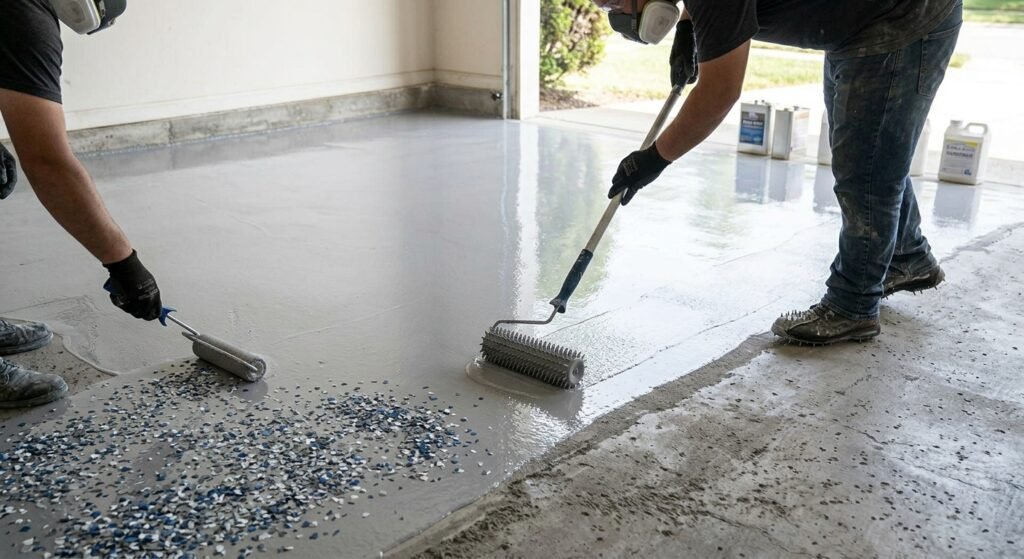
Pour the coating onto the concrete and spread it evenly using a squeegee or roller.
For best results:
- Work in small sections
- Maintain a wet edge
- Apply consistent thickness
- Avoid puddles
Additionally, move systematically across the surface to ensure complete coverage.
Step 9: Add Decorative Elements (Optional)
If you want a decorative finish, add color flakes or metallic pigments while the coating remains wet.
These enhancements:
- Improve appearance
- Hide imperfections
- Increase slip resistance
As a result, the floor achieves a customized and attractive look.
Step 10: Apply Additional Coats
Many coating systems require multiple layers.
After the first coat cures, apply the second coat according to the manufacturer’s recommendations.
Furthermore, multiple layers improve durability, appearance, and protection.
Step 11: Apply a Protective Topcoat
A topcoat provides an additional shield against wear and damage.
Benefits include:
- UV resistance
- Scratch protection
- Improved gloss
- Longer lifespan
Therefore, a quality topcoat significantly enhances overall performance.
Step 12: Allow Proper Curing
Finally, allow the coating to cure fully.
Typical curing times vary:
- Light foot traffic: 24–48 hours
- Vehicle traffic: 3–7 days
- Full cure: Up to 30 days
Although the surface may appear dry, complete curing requires patience.
Common Concrete Coating Mistakes to Avoid
Many coating failures result from avoidable mistakes.
Avoid:
- Poor surface preparation
- Applying coating on damp concrete
- Skipping crack repairs
- Incorrect mixing ratios
- Applying coats too thick
- Ignoring curing times
Therefore, careful preparation and proper application remain essential.
Maintenance Tips for Coated Concrete
After installation, follow these maintenance practices:
- Sweep regularly
- Clean spills immediately
- Avoid harsh chemicals
- Use protective pads under heavy equipment
- Reapply topcoat when necessary
Consequently, the coating can remain attractive and functional for many years.
Conclusion
Learning how to do concrete coating correctly can dramatically improve the durability, appearance, and lifespan of concrete surfaces. By thoroughly cleaning the surface, repairing damage, preparing the concrete properly, and applying high-quality coatings, you can achieve professional-level results. Moreover, regular maintenance will keep the coated surface looking new and performing effectively for years to come.
FAQs
What is the best concrete coating for garage floors?
Epoxy coating is one of the most popular choices because it offers excellent durability, chemical resistance, and aesthetic appeal.
How long does concrete coating last?
A professionally applied concrete coating can last 5 to 20 years, depending on the product, traffic levels, and maintenance.
Can I apply concrete coating myself?
Yes. Many homeowners successfully install concrete coatings. However, proper surface preparation is critical for success.
Do I need to etch concrete before coating?
Yes. Etching or grinding creates a textured surface that improves coating adhesion.